Analyze All Your Transactions With More Precision
Odoo's Analytic accounting feature is best for analyzing each transaction more accurately. This smart feature of Odoo accounting module helps in keeping a tab on all the transactions, whether it is expenditures or incomes. Also, one can get a clear insight into the performance of the projects, divisions, products, and services.
To put it another way, you can track the transaction per product, service, project, and department. Moreover, this functionality will help you avoid creating a bunch of accounts in a chart of accounts. You only have to create the analytic account and tags then add them into your transactions like bills and invoices. Also, you can view and analyze the analytic report, where you can get a complete overview of all the costs and revenues associated with a particular analytic account.
This blog will help you enable & use analytic accounting features and let you understand how this will help your business to track vendor bills, invoice transactions and timesheet cost.
User Guide For Odoo Analytic Accounting
Activate Analytic Accounting Feature
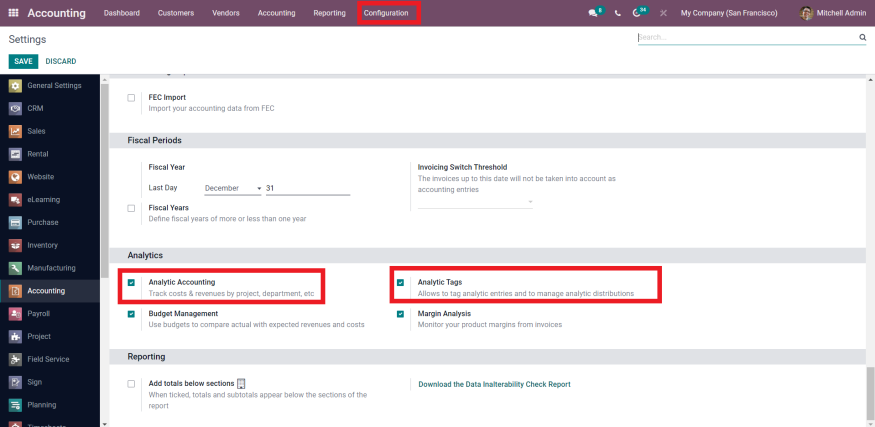
First of all, you need to activate the Analytic Accounting feature by entering into the Accounting Module.
Go to Accounting Module >> Configuration >> Settings >> Analytics
In this screen, you will find the analytics section, where you need to tick mark on the Analytic Accounting box. Further, you can enable the analytic tags by check marking on the box.
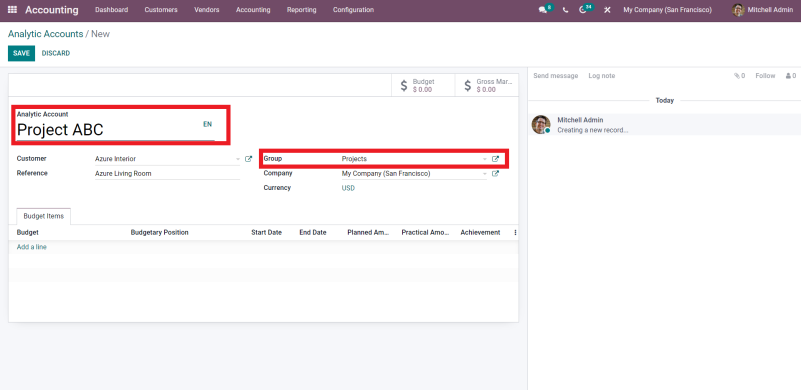
Create Analytic Accounts
Now, you have activated the analytic accounting feature, it will help you get the option for Analytic Accounts under the Configuration.
Configuration >> Analytic Accounting >> Analytic Accounts
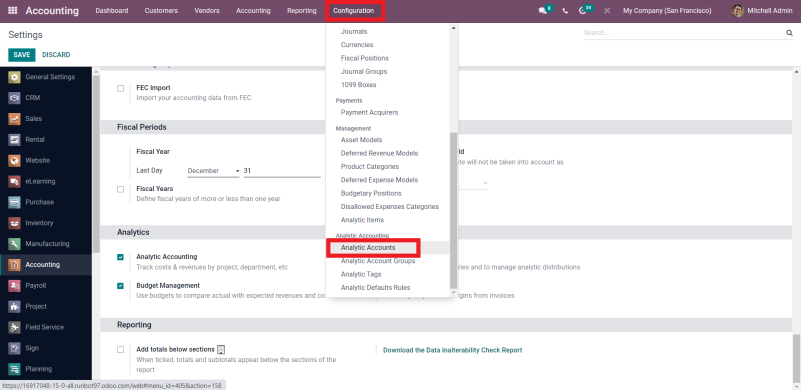
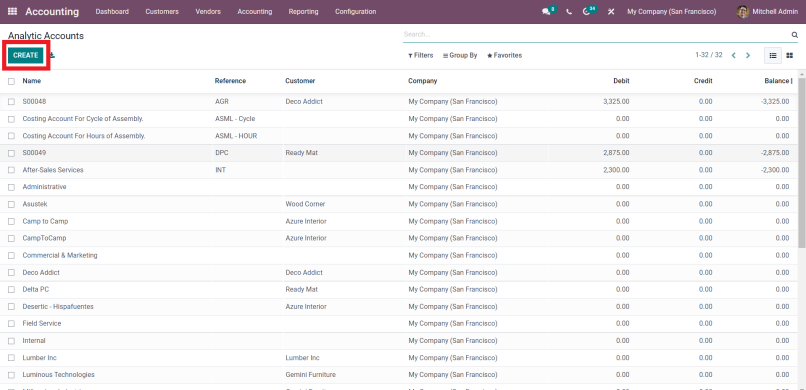
Click on the analytic accounts section then you will be able to view and create analytic accounts.
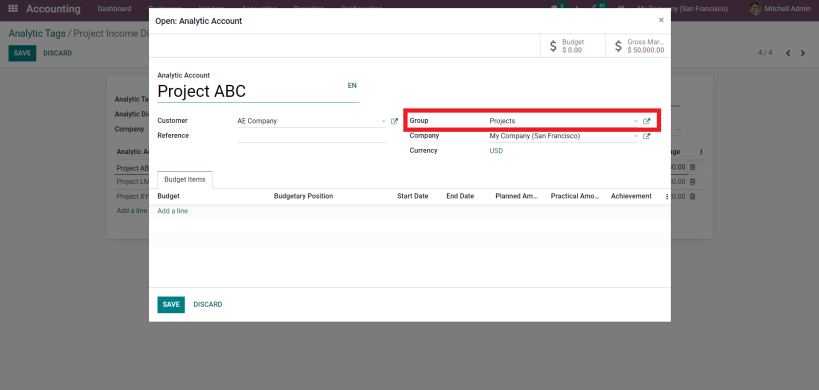
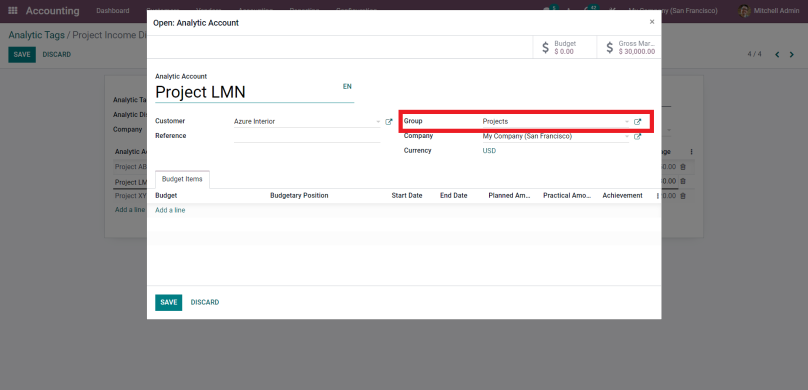
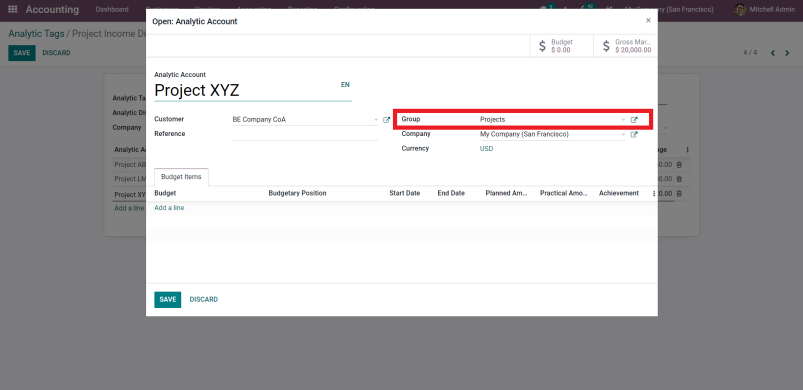
Create the analytic account by adding name, selecting customer, company (if multiple companies enabled) and fill in other important information. Moreover, you can specify the Group, it will help you group the similar kinds of analytic accounts. Now, you can view and analyze multiple analytic accounts as per the groups.
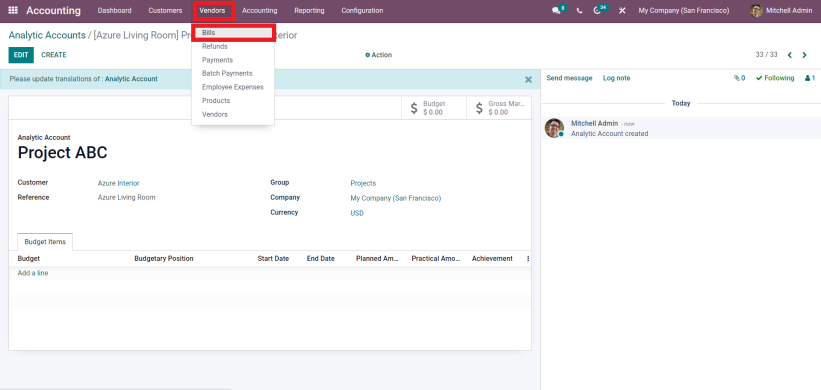
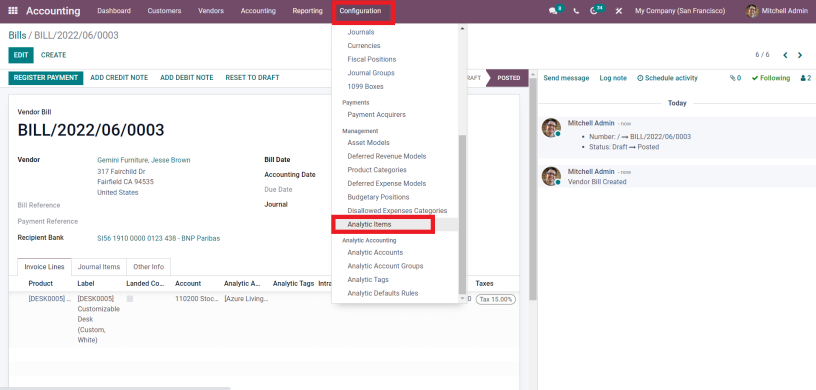
Create A Bill
For checking the costs linked with a particular analytic account, first, you need to create a bill.
Simply, go to the Vendors menu, then choose Bills option. Click on the create button.
Here, you will be adding vendor name, bill reference, bill date, etc.
Now, simply add the product, its prices, quantity, tex, etc. And do not forget to select the analytic account, add an analytic account in the invoice line.
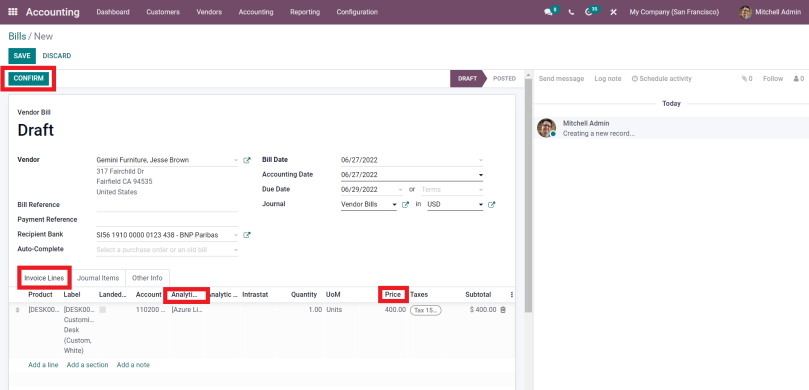
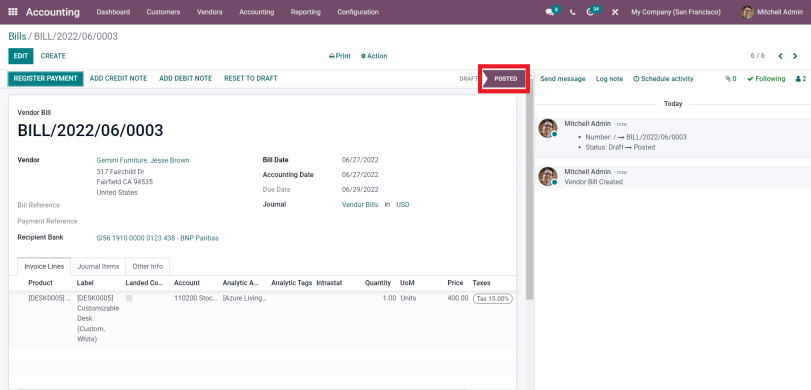
Now, you can easily save and confirm the Vendor Bill. This will post the bill entry.
View Analytic Item
For checking if the bill expense is recorded as an analytic item, you need to navigate through Configuration >> Management >> Analytic Items
Select analytic items option, now you will see all your analytic Items
And, if you want to view any particular item, click on Group By and then choose Analytic Account.
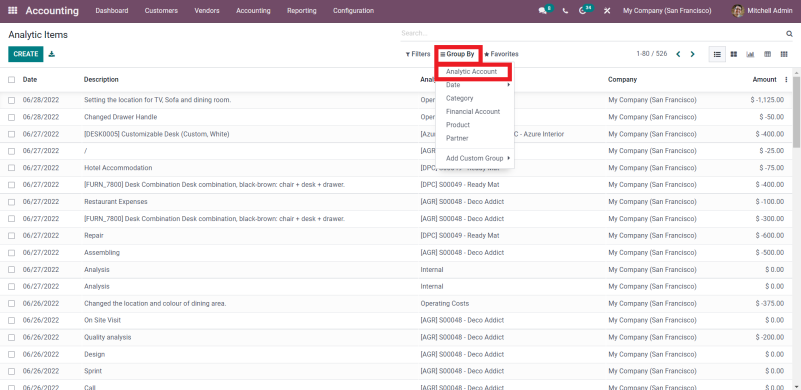
Here you can see all your analytic accounts separately.
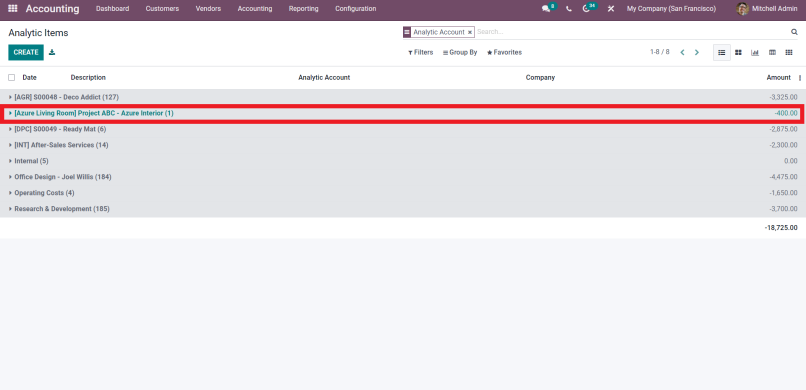
Go ahead and click on the analytic account then you will be able to view the analytic items associated. Items can be an invoice, employee timesheet, or vendor bill. Select an item to have a full insight of the record.

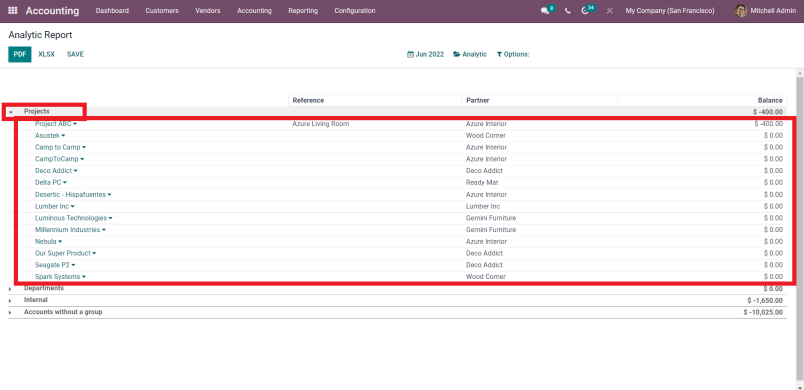
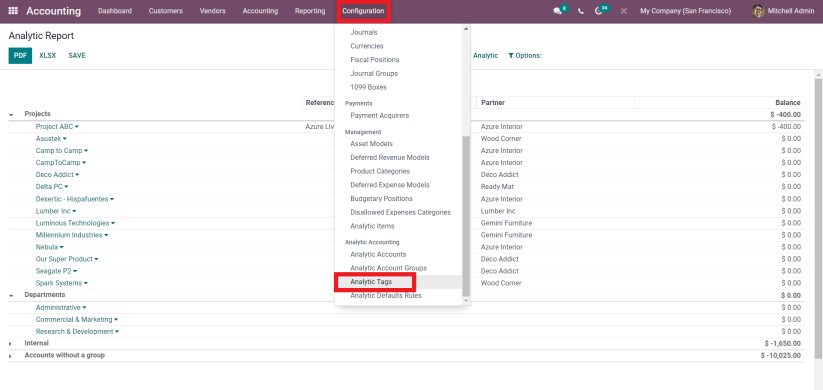
View Analytic Report
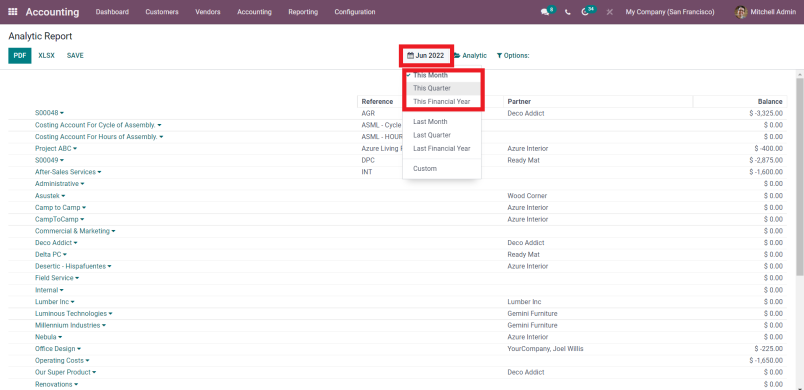
If you want to see the analytic reports for your accounts, navigate through Reporting Menu >> Management >> Analytic Report
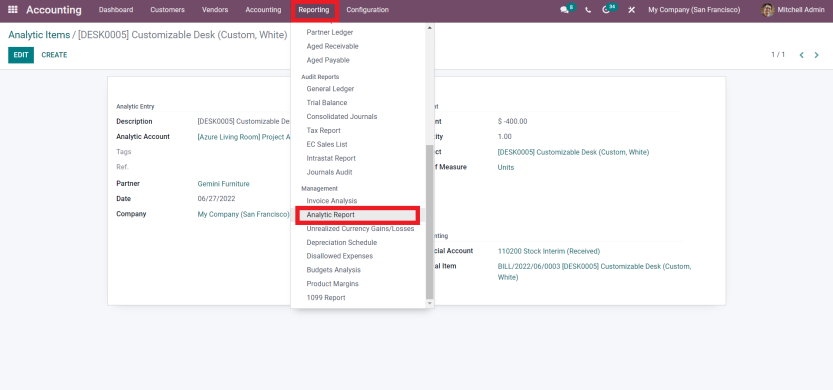
Here, you can see all your Analytic Reports at once.
Further, if needed, you can easily filter reports on a yearly, quarterly, and monthly basis.
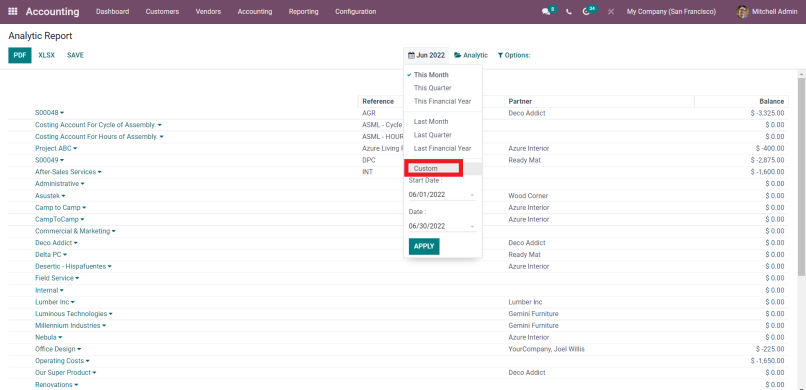
Also, you can set a date range, using the Custom filter option.
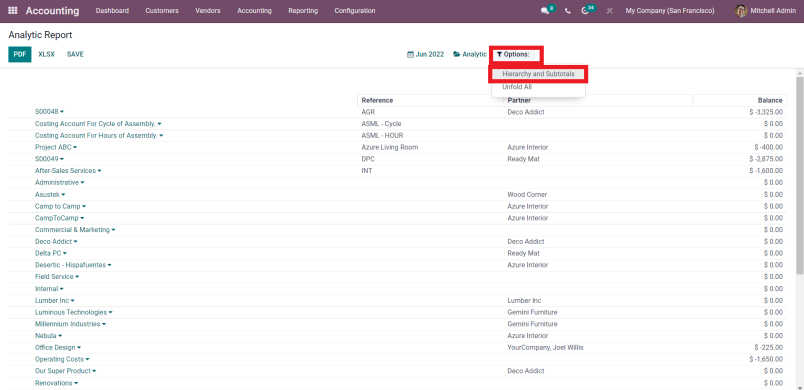
To see the clearer and better analytic report, click on the Options button and you will get the option for Hierarchy and Subtotal basis.
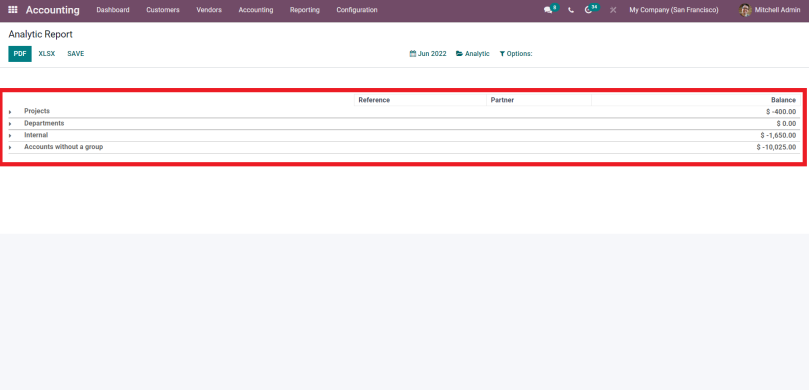
Here you will view all the groups, click on them and get to analyze the reports of all the analytics accounts linked with the group.
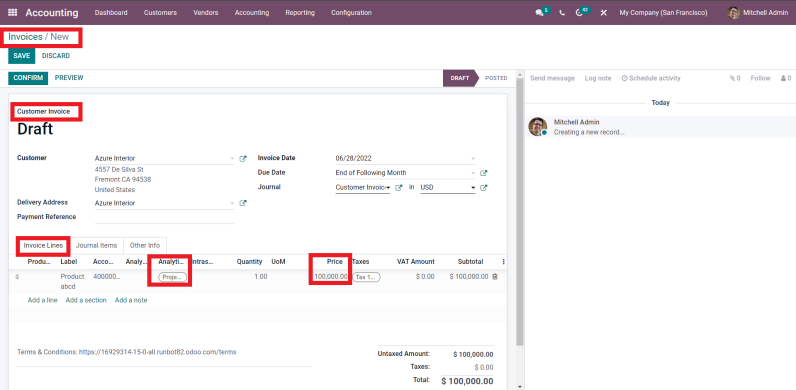
Create an Invoice
Further, to analyze each analytic account’s gross margin, which is the difference between the earnings and expenses, you need to create an invoice for the analytic account for which you have created the bill.
Go to the Customers menu and then click on Invoice. Now, create an Invoice by adding the customer name, invoice date, due date, and other details,
Further, go ahead and fill in the details in invoice lines; product name, price, quantity, tax, and analytic account.
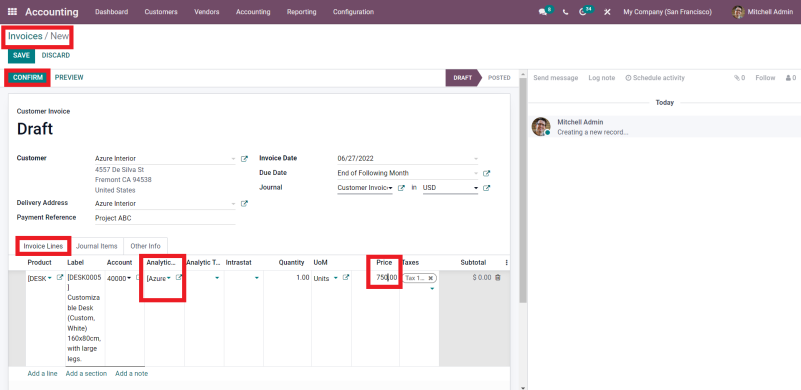
Post the invoice entry by saving and confirming the invoice.

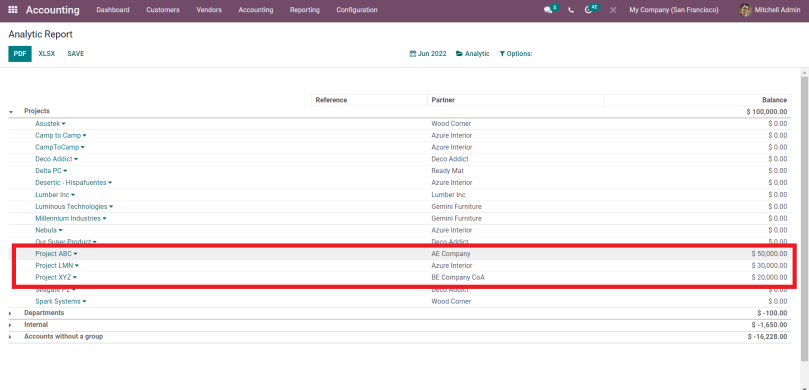
Analytic Report Analysis
Now, go to the analytic report and analyze the gross margin for that analytic account.
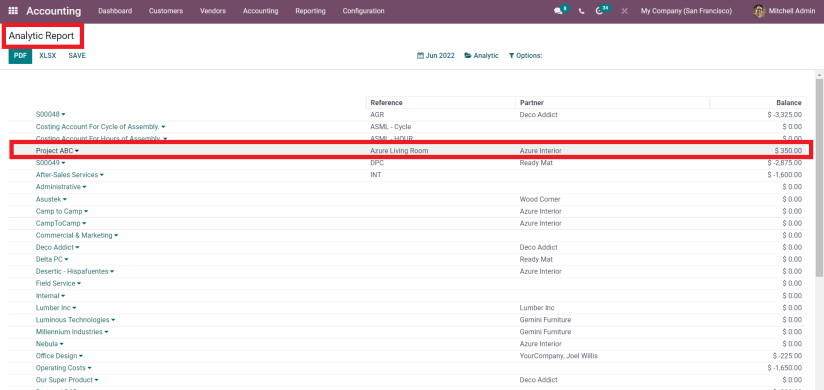
Click on the analytic account and then you will be able to analyze the gross margin for the particular account.
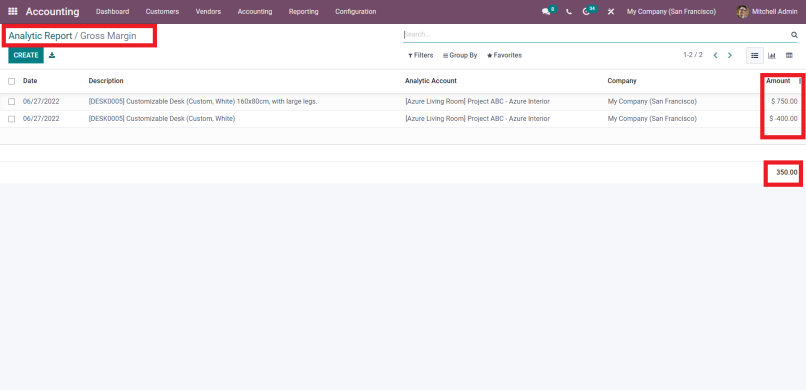
This is the best way to track and analyze the expenses and incomes linked with an analytic account.
Create Analytic Tags
Analytics tags are an outstanding feature of Odoo accounting module. You must be wondering how a tag can help you manage the accounts. But using the analytic tags, you can easily manage and track your analytic accounts. Tags allow you to enable the analytic distribution which further helps in distributing the costs and profit among multiple analytic accounts.
For getting a clearer idea of the analytic tags functionality, let’s dive into the process of creating and utilizing analyst tags.
Move to Configuration >> Analytic Accounting >> Analytic Tags
Go ahead and create an Analytic Tag. Further, tick mark the Analytic Distribution box. Activating the analytic distribution is necessary if you want the same tag for multiple analytic accounts. Also, it helps in distributing the revenue and cost.
As soon as you activate the Analytic Distribution Option, you will see the option to add multiple analytic accounts. In the Analytic account section, add multiple Analytic Accounts. All the analytic accounts added under a tag will be associated with a single tag.
Further, you can disperse the percentage in the added analytic account. Ultimately, it will allow you to distribute the expenditure and revenue into various projects and departments.
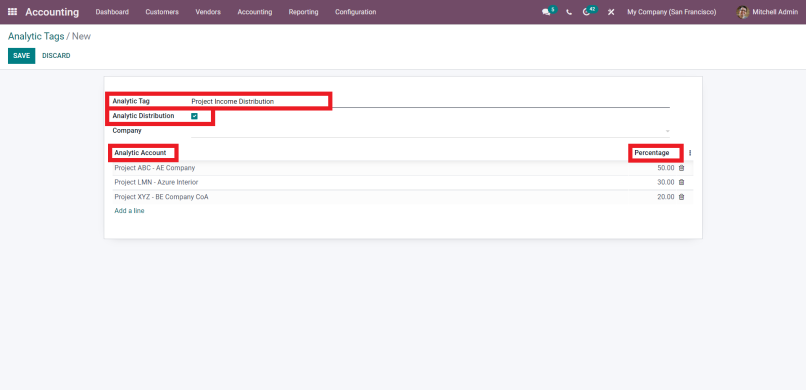
But one thing you need to keep in mind, all the accounts you have added must have the same group.
Let’s check if the distribution of percentage is working properly. Create the invoice and select the tag.
Now, you will see the total amount mentioned in the invoice is distributed among the analytic accounts according to the defined percentage.
Create Projects
Another advanced function of Odoo analytic accounting is, it is closely connected with the Odoo project module. Let’s see how the project module is integrated with the accounting module.
As mentioned above, it has been established that analytic accounting is blended with the projects, and the timesheet hours are considered as the expenses or costs.
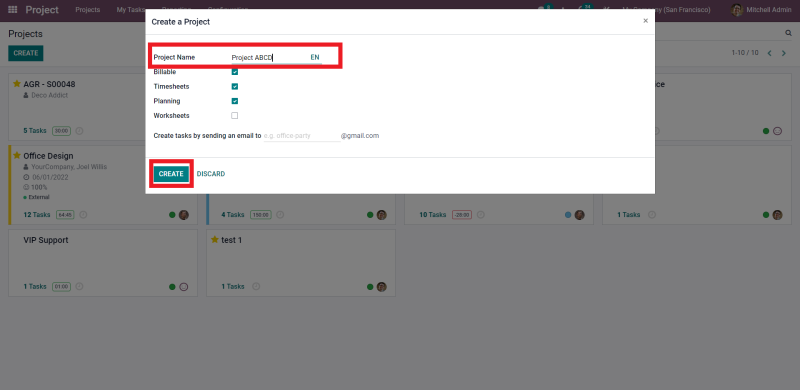
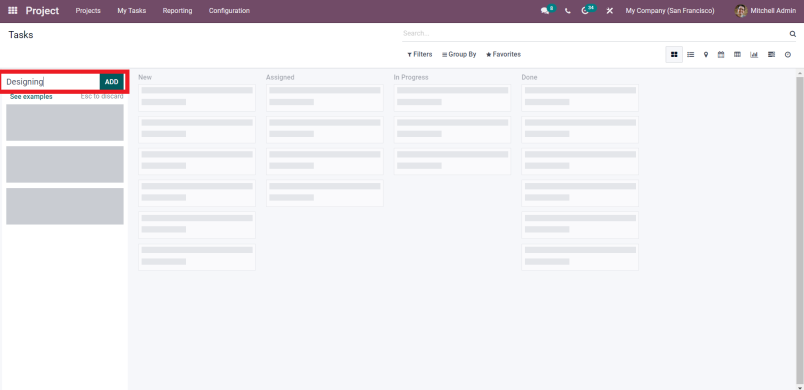
Open the Project Module >> Create Project . Further add the Project Name.

Now, create a stage and enter the tasks into the project.
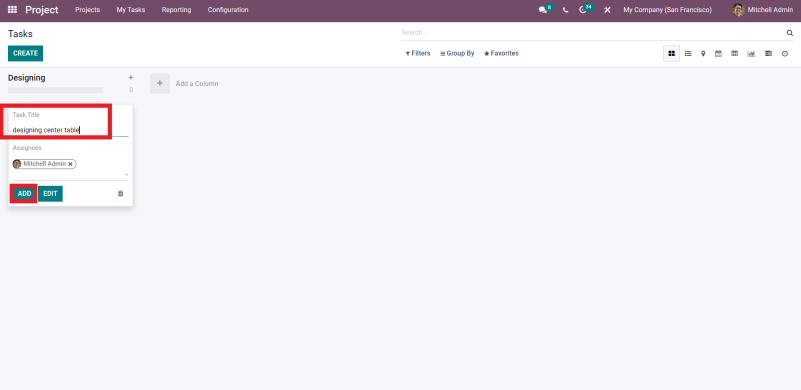
Go to the task and fill out the employee timesheet, add the employee name, date, task description and hours spent.
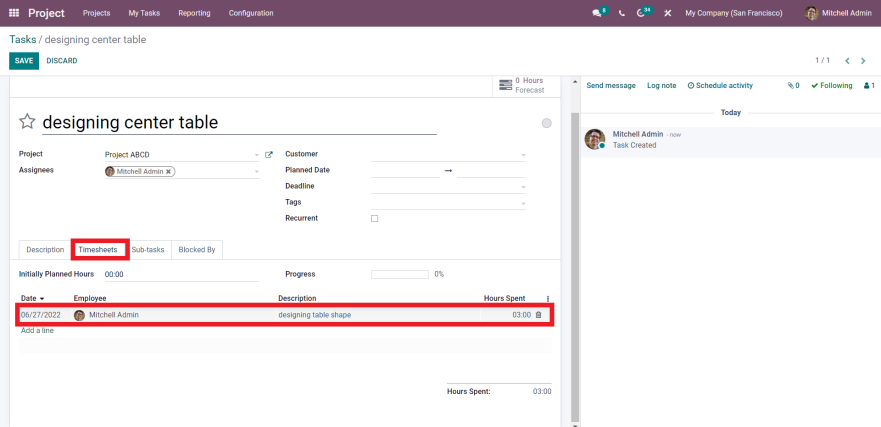
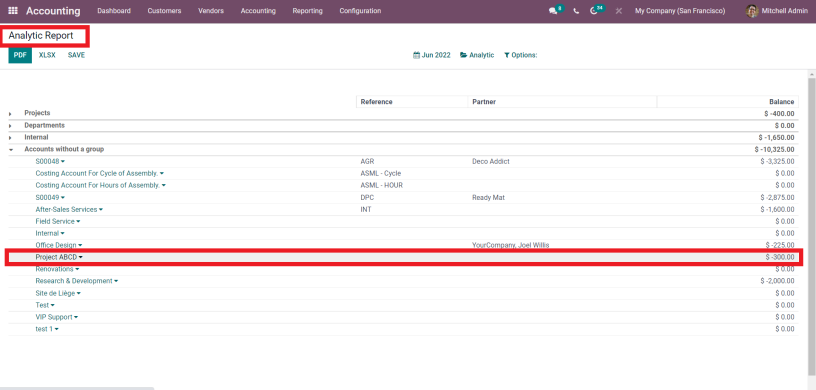
Open the accounting module and then click on the analytic report. The project will be created as an analyst account automatically. And, the time spent on a task that you have filled in the timesheet section will be updated as the costs. The cost will be updated according to the employee time cost that you have set in the employee record.
For example, if you have configured an employee’s one hour is equal to a hundred dollars, it will be updated as three hundred dollars in the analytic account.
In this manner, a business can handle and track all its transactions in the analytic accounts. And they can keep track and analyze all the costs and profits. It is the most suitable way to avoid transaction tracking errors.
Moreover, you can get a complete overview of the profit and expenses of a particular department, project, service, or product. Odoo is making accounting simpler and more effective for businesses. Moreover, if you want to customize teh Odoo solutions, work with the top Certified Odoo Partner in USA. O2b Technologies is an Odoo silver partner and has completed hundreds of Odoo implementation and customization projects successfully.